Have you jumped on the Kombucha bandwagon yet? The fizzy, slightly vinegar-y, fermented tea is wildly popular and surprisingly easy to brew at home. I’m excited to share with you how to do it!
Kombucha is a big favorite in our house, but buying it at the grocery store is cost prohibitive. Sixteen-ounce bottles range from $4 to $7 at my local supermarket, which means having a bottle a day would have a large impact on our grocery budget.
Homebrew to the rescue! About six months ago, we started brewing Kombucha in our own kitchen. While it’s not exactly quick or an immediate gratification project, it’s incredibly inexpensive and it’s easy. To brew 3 gallons of Kombucha a week, I invest less than two hours of my time, much of it inactive time while I wait on water to boil. To give you an idea of what my 3 gallons of homebrew is comparable to at the grocery store, it’s approximately 24 bottles, well over $100. My at-home brewing cost is less than $10, 90% less than buying at the store. I love a good bargain, especially when it’s healthy!
Let me back up just a minute and tell you a little about Kombucha in case it’s new to you.
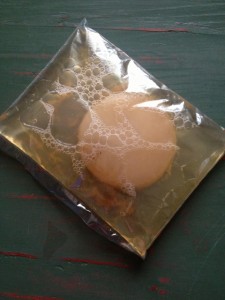
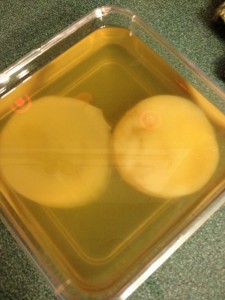
Kombucha is fermented sweetened tea. It functions with a SCOBY, a symbiotic culture of bacteria and yeast. Ever had a bread starter, like Amish Friendship Bread? Think of that, only for a drink. Kombucha has a “mother” or a “mushroom” SCOBY in each jar. It reminds me of a jellyfish with little brown tentacle-like strands of yeast. It’s gelatinous and usually floats on top of the tea, but can also sink or hover. It grows quickly and can easily be split to make additional batches or share with friends. (I am aware this sounds kinda gross and not particularly appetizing. Once you taste it, you’ll get past it. And you’re not eating the gelatinous floaty part anyway, just drinking the liquid.)
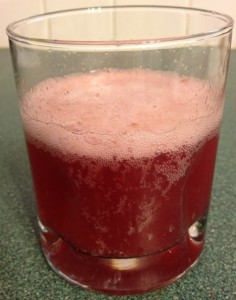
Why drink Kombucha? It’s a great replacement for processed sodas. No mystery ingredients, lower sugar content and you can flavor it any way you would like. It’s also a fermented food, which makes it probiotic-rich! We practice double fermentation here, which means we ferment two times. The result is a delicious, fizzy drink that is much better for our tummies than soda.
Below I’m sharing the how-to in 12 simple steps. You’ll find many methods of brewing Kombucha on-line. I’m sharing the method that has kept my SCOBYs thriving for the past six months.
How To Brew Kombucha
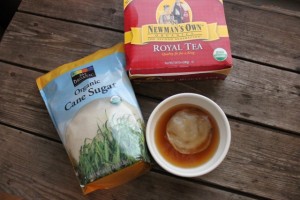
Supplies you will need:
SCOBY (You can buy one, I bought one here, or get one from a trusted friend or other local source)
1/2 gallon glass jar with a wide top (not a narrow bottle)
4 organic black tea bags OR a combination of black and green (the caffeine content is necessary to feed the SCOBY, do not use decaffeinated)
1/2 to 1 cup organic cane sugar (refined sugar is best, other sugars do not provide the necessary energy to feed the SCOBY. No worries though, the SCOBY lives off of the sugar so very little is passed along to you. Kombucha is not a high sugar beverage.)
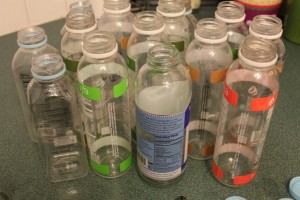
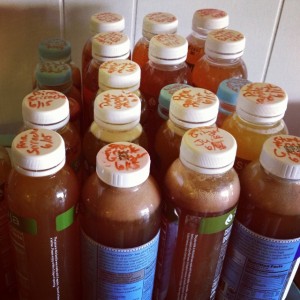
4 single serve bottles (I re-use bottles that I’ve kept from store bought Kombucha and juices)
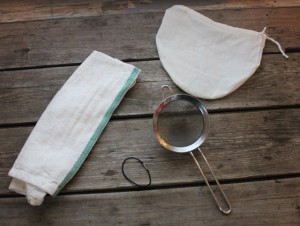
A tight-weave dish towel or unbleached paper coffee filter (I use these towels.)
A hair elastic, rubber band from broccoli or jar canning ring if using a paper coffee filter
Nut milk bag (I like this one) or a fine mesh strainer
Minimal amounts of fruit juice, vegetable juice, herbs, etc…for flavoring
1. Brew 1/2 gallon tea with 4 tea bags, add 1 cup of sugar and let it come to room temperature. (Start with 1 cup of sugar and after your SCOBY is well established, you may try tapering down the amount of sugar each week.)
2. In the 1/2 gallon jar, add your SCOBY and the liquid that is with it.
3. Top with room temperature sweetened tea.
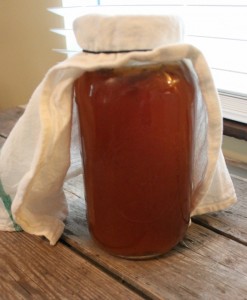
4. Cover with towel or paper coffee filter and secure with either elastic, rubber band or canning ring. Place in a quiet spot where you won’t need to move it for at least a week. A place where the temperature is consistently around 70 degrees is good.
5. Let sit for 7 to 10 days. (This is the end of “first fermentation.”) .
6. After the 7 to 10 days has passed, ready four containers to bottle your Kombucha. This is called “second fermentation.” Rinse the bottles and lids to make sure they are clean and ready to go.
7. Gently remove the SCOBY from the jar. If it has grown a lot, you may be able to peel the new layer off and split the SCOBY into two parts, one to share with a friend or keep for a second batch, and the original. You will need to reserve 1 cup of the Kombucha liquid along with your SCOBY to start the second batch. I place mine in a cereal bowl while I tend the remaining Kombucha.
8. After you’ve removed the SCOBY and 1 cup of liquid, you can strain the remaining liquid. You can use either a nut milk bag or a fine metal strainer.
9. Once strained, pour the Kombucha into single serve bottles.
10. This is your opportunity to flavor the Kombucha. I add no more than 2 T. of fruit juice, herbs, etc…for flavoring to each bottle. When I was learning to brew Kombucha, most folks said, “Just a splash!” They were right, it doesn’t take much to flavor a bottle.
11. Seal the individual bottles tightly and allow to sit at room temperature for up to 1 week. The second fermentation will be done then. If you’ve bottled in plastic bottles, you’ll notice the bottles are very firm. This is because your Kombucha has fermented and gotten very fizzy. Use caution when opening the bottles, it will be like a well-shaken soda!
12. After one week, place the double-fermented Kombucha bottles in the refrigerator. This will slow down any additional fermentation. And drink up!*
Every week or 10 days, lather, rinse, repeat this whole process. We try to choose Sundays as Kombucha Day, tending our SCOBYs and bottling the same day every week. But it doesn’t always work out that way so sometimes we go a few days longer. So far that has worked out ok, too.
One last tidbit about adding juices or flavorings to your Kombucha: I started by looking at flavors available at the store. My favorite fella likes anything with ginger, so we bottle lots of ginger juice-based flavors. Some of our favorite flavors so far: honey ginger basil (with lightly crushed basil leaves in the bottle), cranberry pomegranate ginger, pineapple apple mint, pineapple cilantro, blueberry ginger lemonade (which is a bright pink color), stone fruit puree ginger, watermelon basil… I hope that gives you a few ideas. You can add whole pieces of fruit to the bottle, but I have the best success using juices or purees. With herbs, I will juice them if I happen to have the juicer out, otherwise I put leaves directly into the bottles.
So there you have it, a 12-step program for making your own Kombucha. Once you try homemade Kombucha, you’ll need a 12-step program to give it up. It really is that good! Stick around, I’ve got a few recipes coming up that incorporate Kombucha, including a Summer Sangria.
*About drinking up: when you are new to Kombucha, and specifically home-brewed Kombucha, ease into it. Homebrew in particular can have a high probiotic content. If you are not currently taking probiotics or eating lots of pre- or probiotic foods, you could get some unsavory side effects, like a probiotic headache. Have a little bit and see how you do before chugging an entire bottle. This is coming from the voice of experience here. 🙂
Disclosure: This post contains affiliate links. By clicking on links in this post and making purchases, Johnna may make a bit of money, which allows her to continue providing free content to you on this site. Thanks for your support!

thanks for the information
useful information and posts